Enjoy $20 Off Your First Shoot 📸 🎉
5 iPhone Photography Tips for Using Natural Light

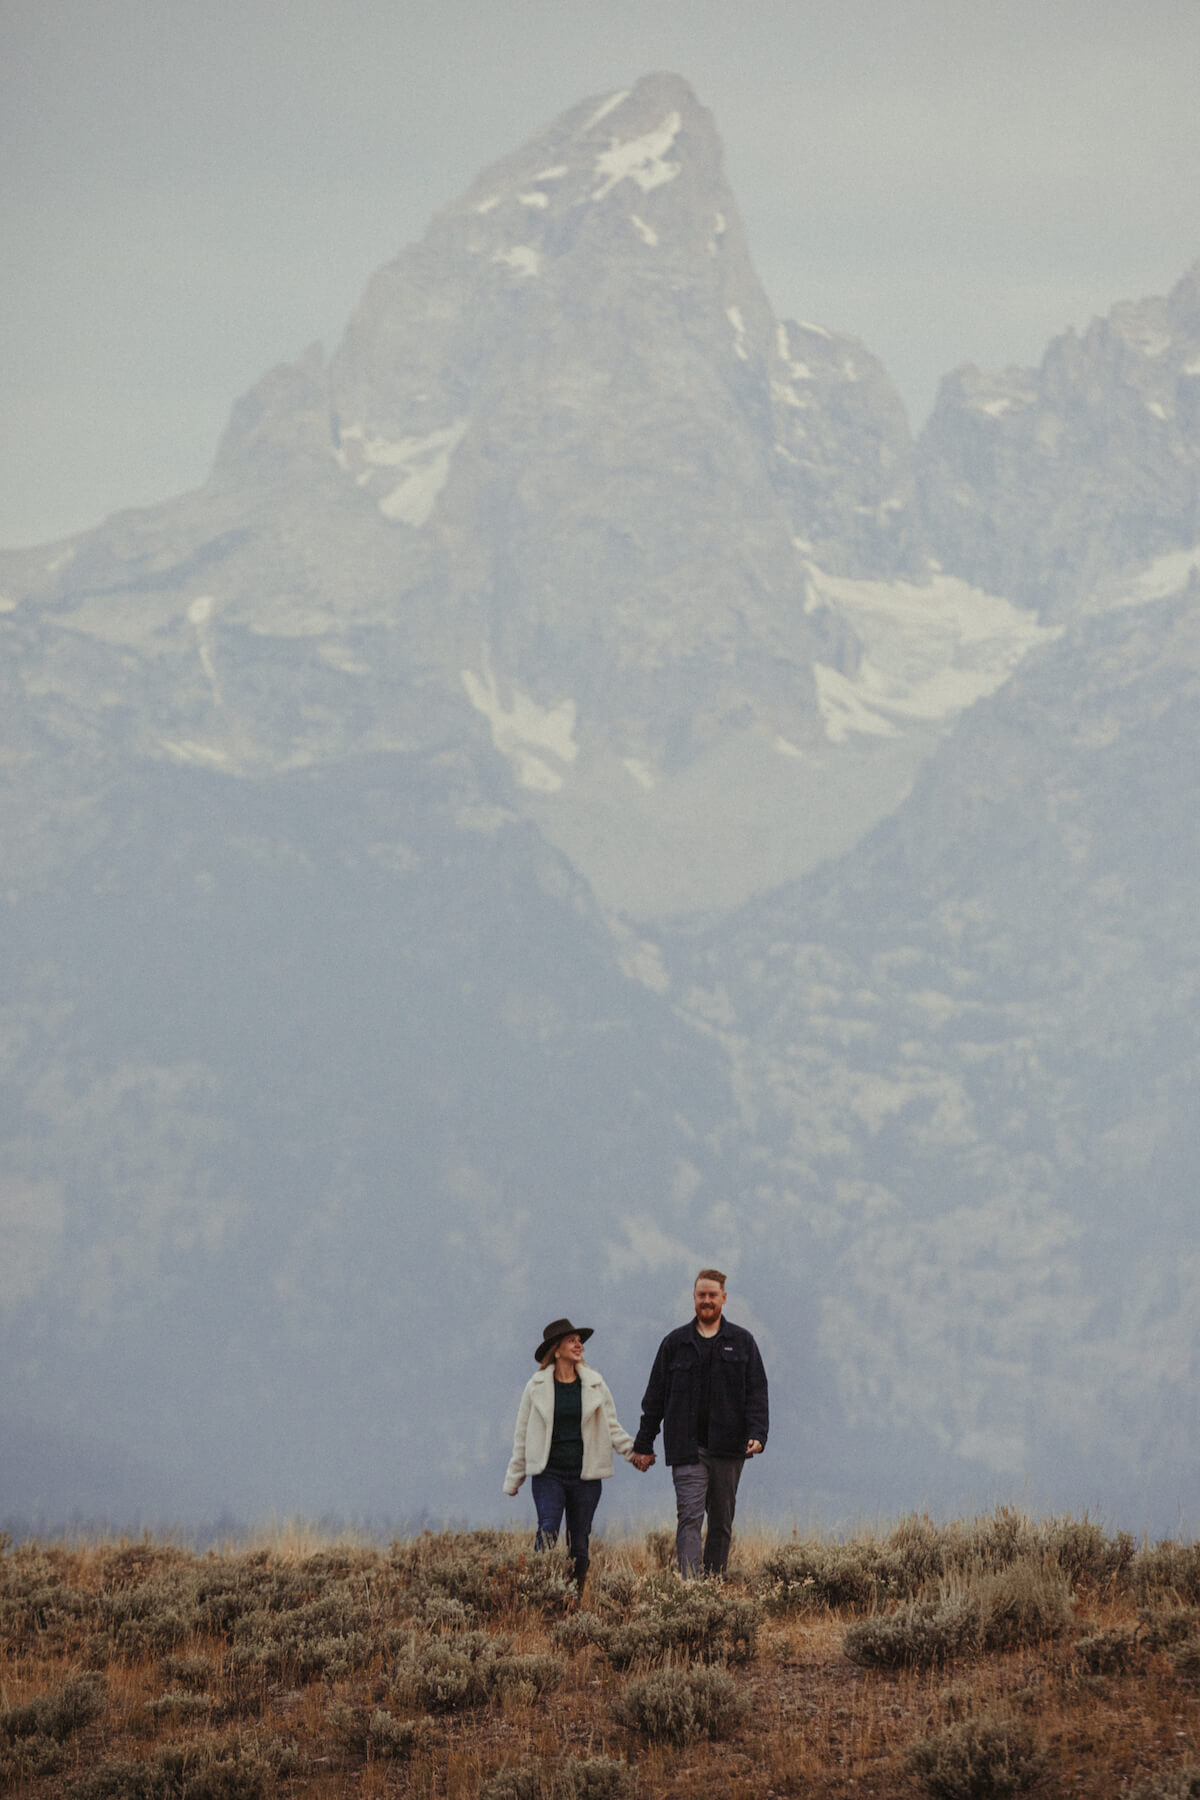
Natural light photo challenge
If you’re a part of our Flytographer community, we know you appreciate the power and beauty of a good photo 📸 Our Flytographers around the world are ready to capture amazing memories during a special photo shoot … but what about your everyday life? Unless you have a professional photographer with you every second of the day (and if you do … is this Beyoncé reading? 😉), there are moments that are up to you to document.
We want you to feel empowered to capture beautiful memories yourself. Join our community of memory-makers as we host our first-ever photo challenge with the goal of sharing easy tips to help you take better photos with your iPhone! 🤳
Bonus contest! 🎉 We are giving away a “Better Photos Prize Pack,” which includes our iPhone Photography Course and a set of Flytographer Lightroom Presets, to one lucky winner! Simply take a photo using one of these tips and post it to your Instagram feed or story using the hashtag #FlytographerChallenge to be entered into our draw. This challenge ends on June 30th, 2021, so get ready to document some magic! ✨
How natural light can help you to take better photos with your iPhone camera
If opening up your camera app brings more anxiety than enjoyment, we’re here to help! With just a few easy photo tips and some practice, we have no doubt you’ll feel ready to capture meaningful family photos every day — no professional photographer, fancy DSLR or digital camera required. Even if you’re working on your photography skills for the very first time, great shots are just around the corner. Let’s dive in! 🏊♀️
Natural light is the foundation for every great photo. If you’re able to find the best light, you’ll easily be able to take the best photos ☀️ Once you know what to look for, you’ll begin to notice good lighting everywhere you go!
1. Basic light principles
Did you know that the word photography literally means “drawing with light?” 🎨 Without light, you cannot take a photo. When you’re photographing a moment, think about your lighting first before you click that shutter.
What is soft light versus harsh light in photography?
We can break light down into two categories: soft light and harsh light. Both have their pros and cons, but soft light is naturally more flattering for portraits. Have you ever been surprised to hear a photographer say they love a cloudy day? 🌥 It’s because clouds create soft, diffused light that’s easy to work with. Soft light can also be found in shadows, such as when the bright sun is hidden behind a building or tree.
Harsh light, on the other hand, is usually found during the middle of a sunny day, when the sun is high and bright in the sky. (It’s also why we don’t recommend booking a Flytographer shoot at midday!) It’s generally more difficult to take photos in harsh light because it creates hard lines and shadows. ☀️
Think of soft and harsh light like a lamp. Do you leave the bulb bright and exposed in your living room, or add a lamp shade to diffuse the light?💡 When in doubt, look for the soft light.
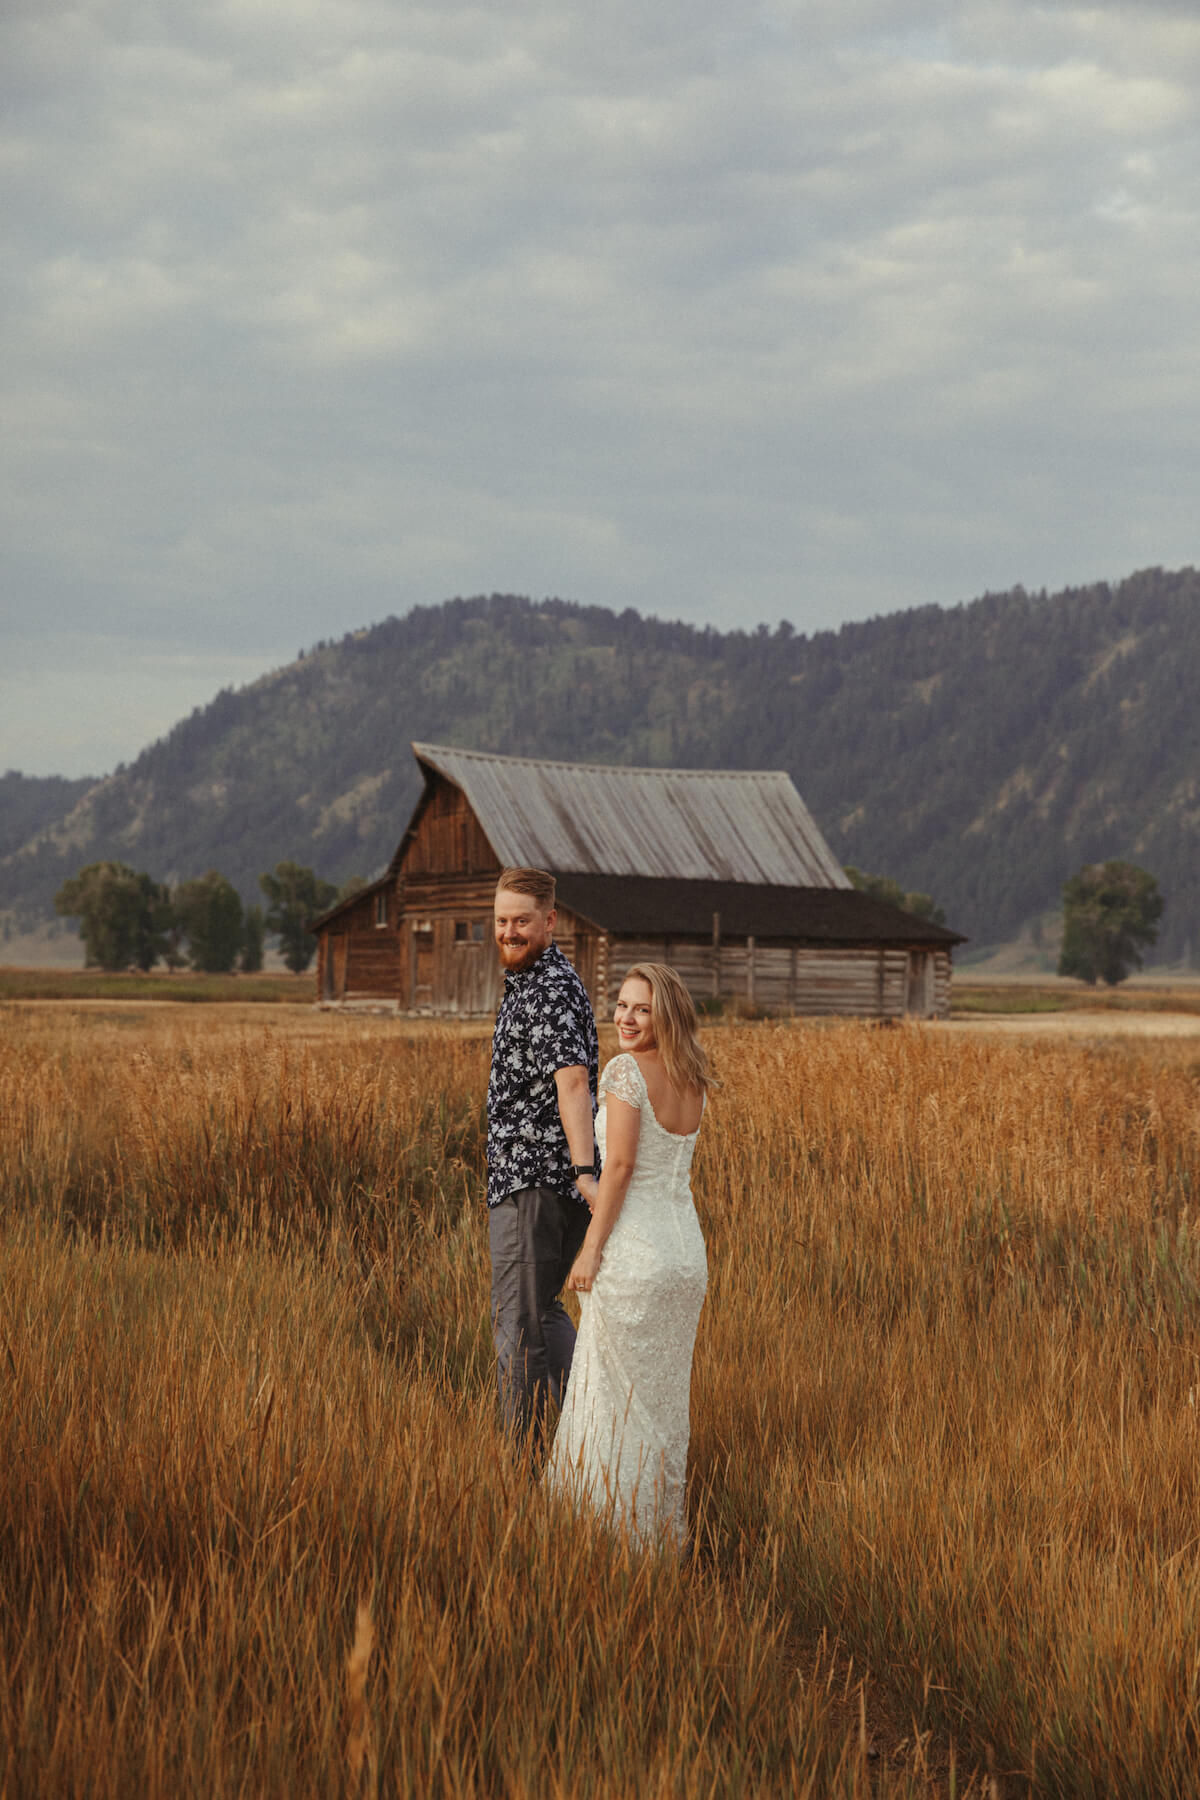
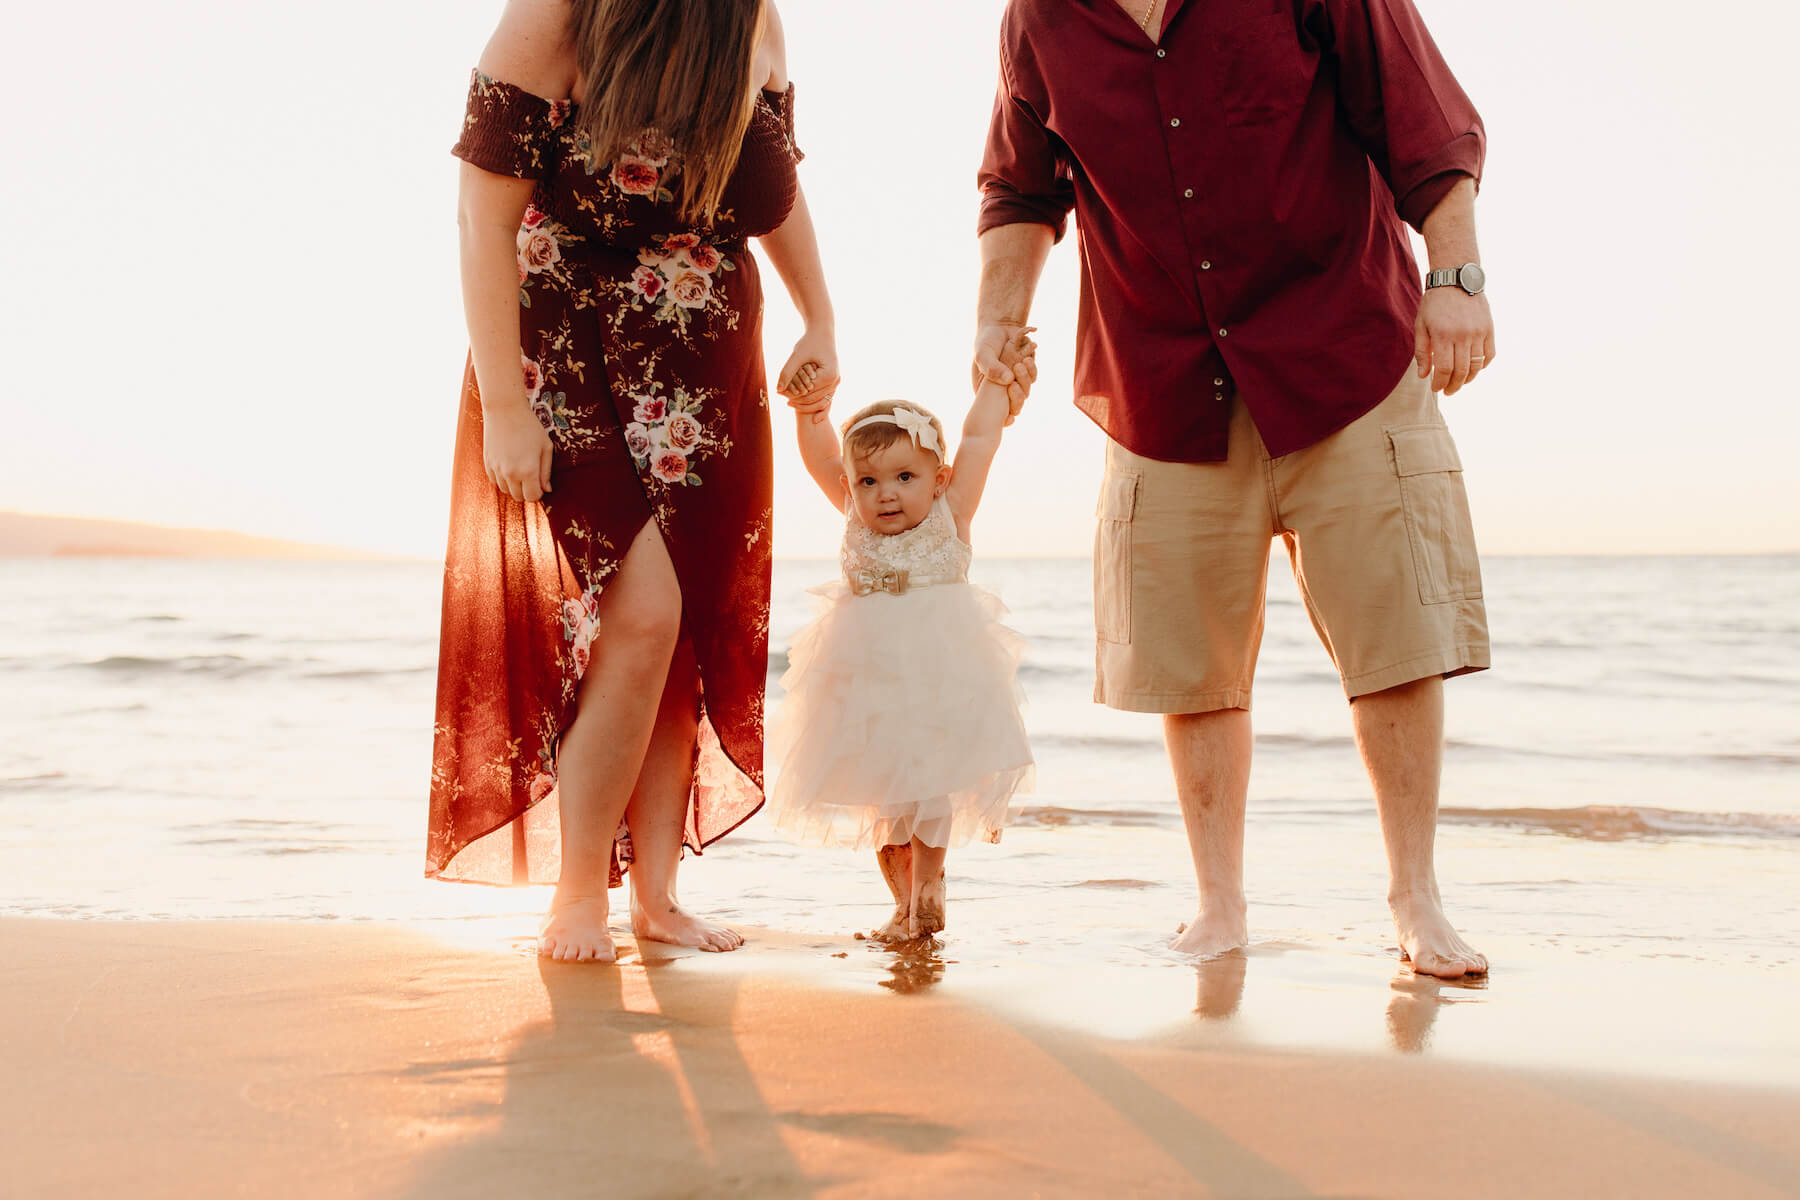
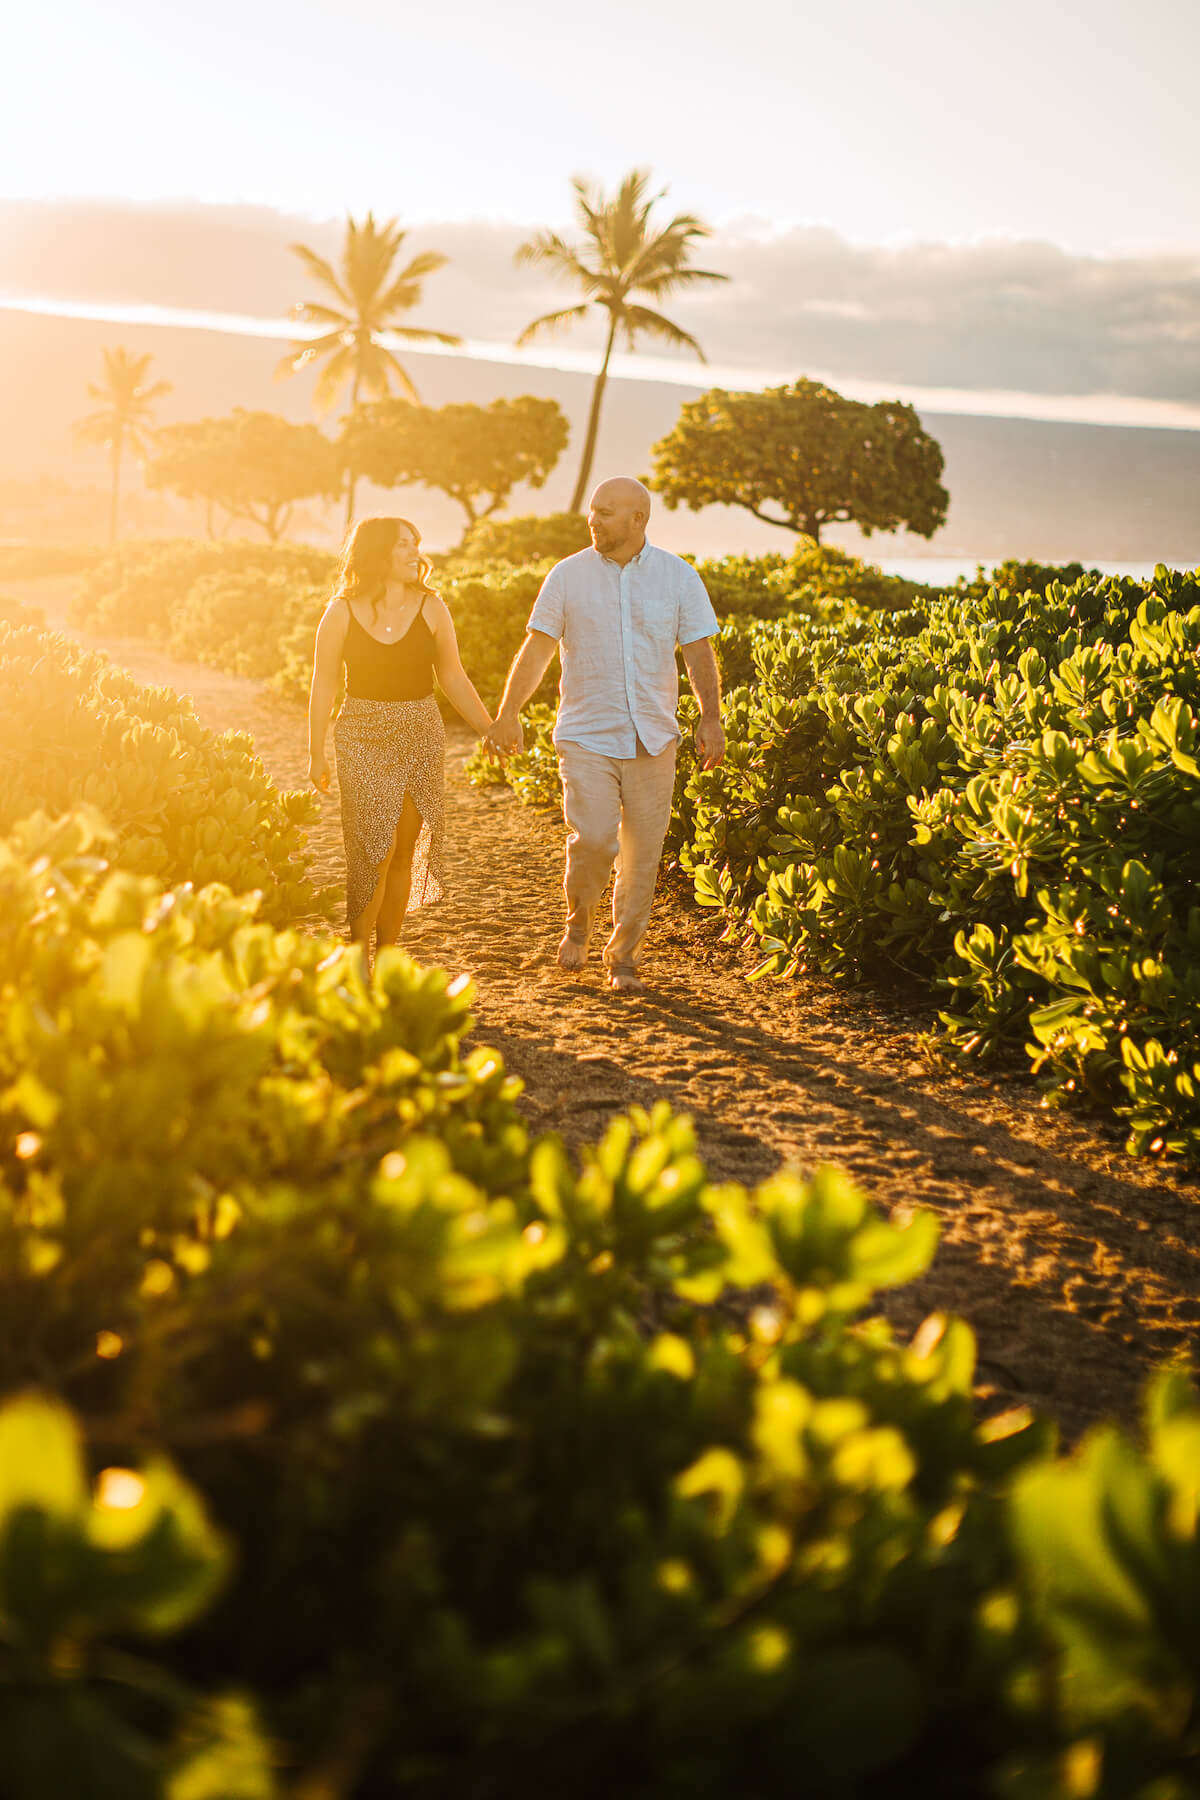
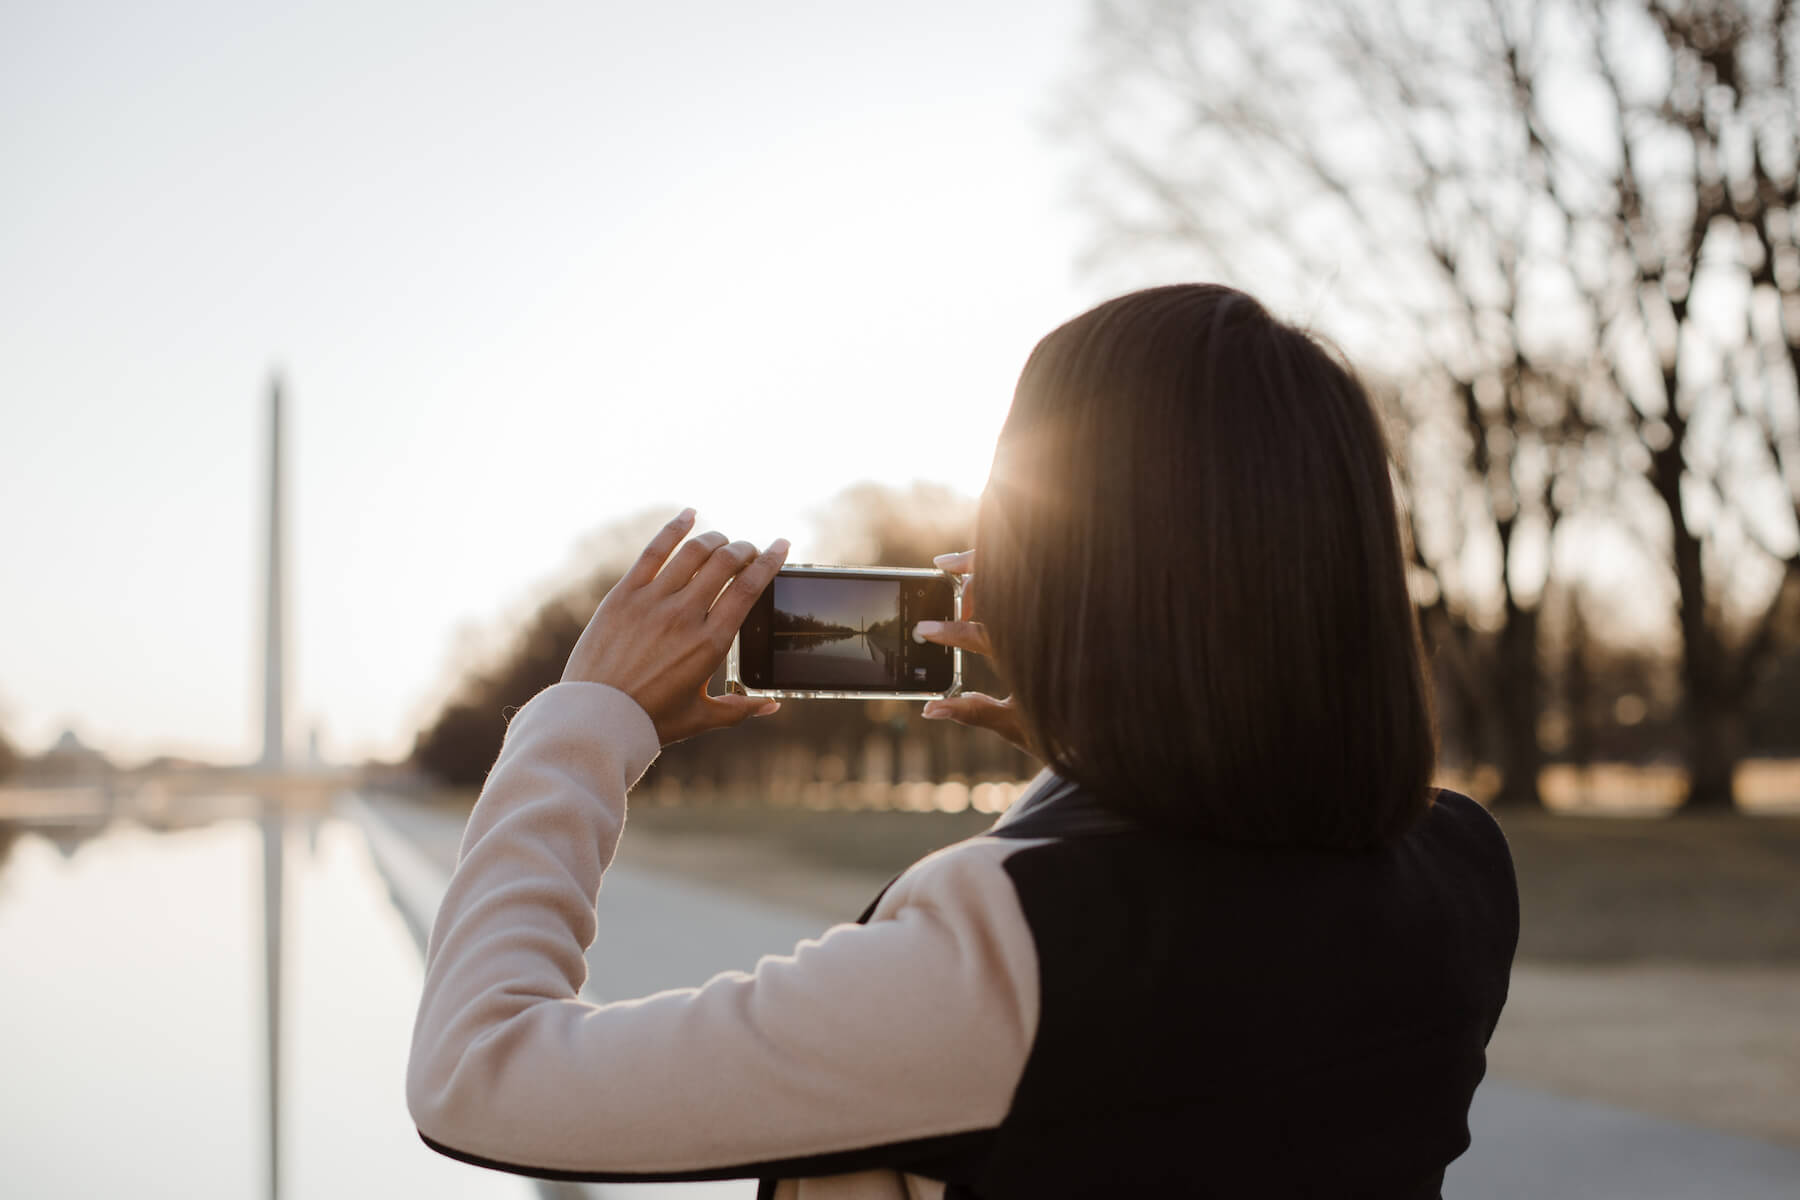
SOFT LIGHT
The photo above was taken during the golden hour after the sun has set behind the horizon which works to create soft lighting conditions.
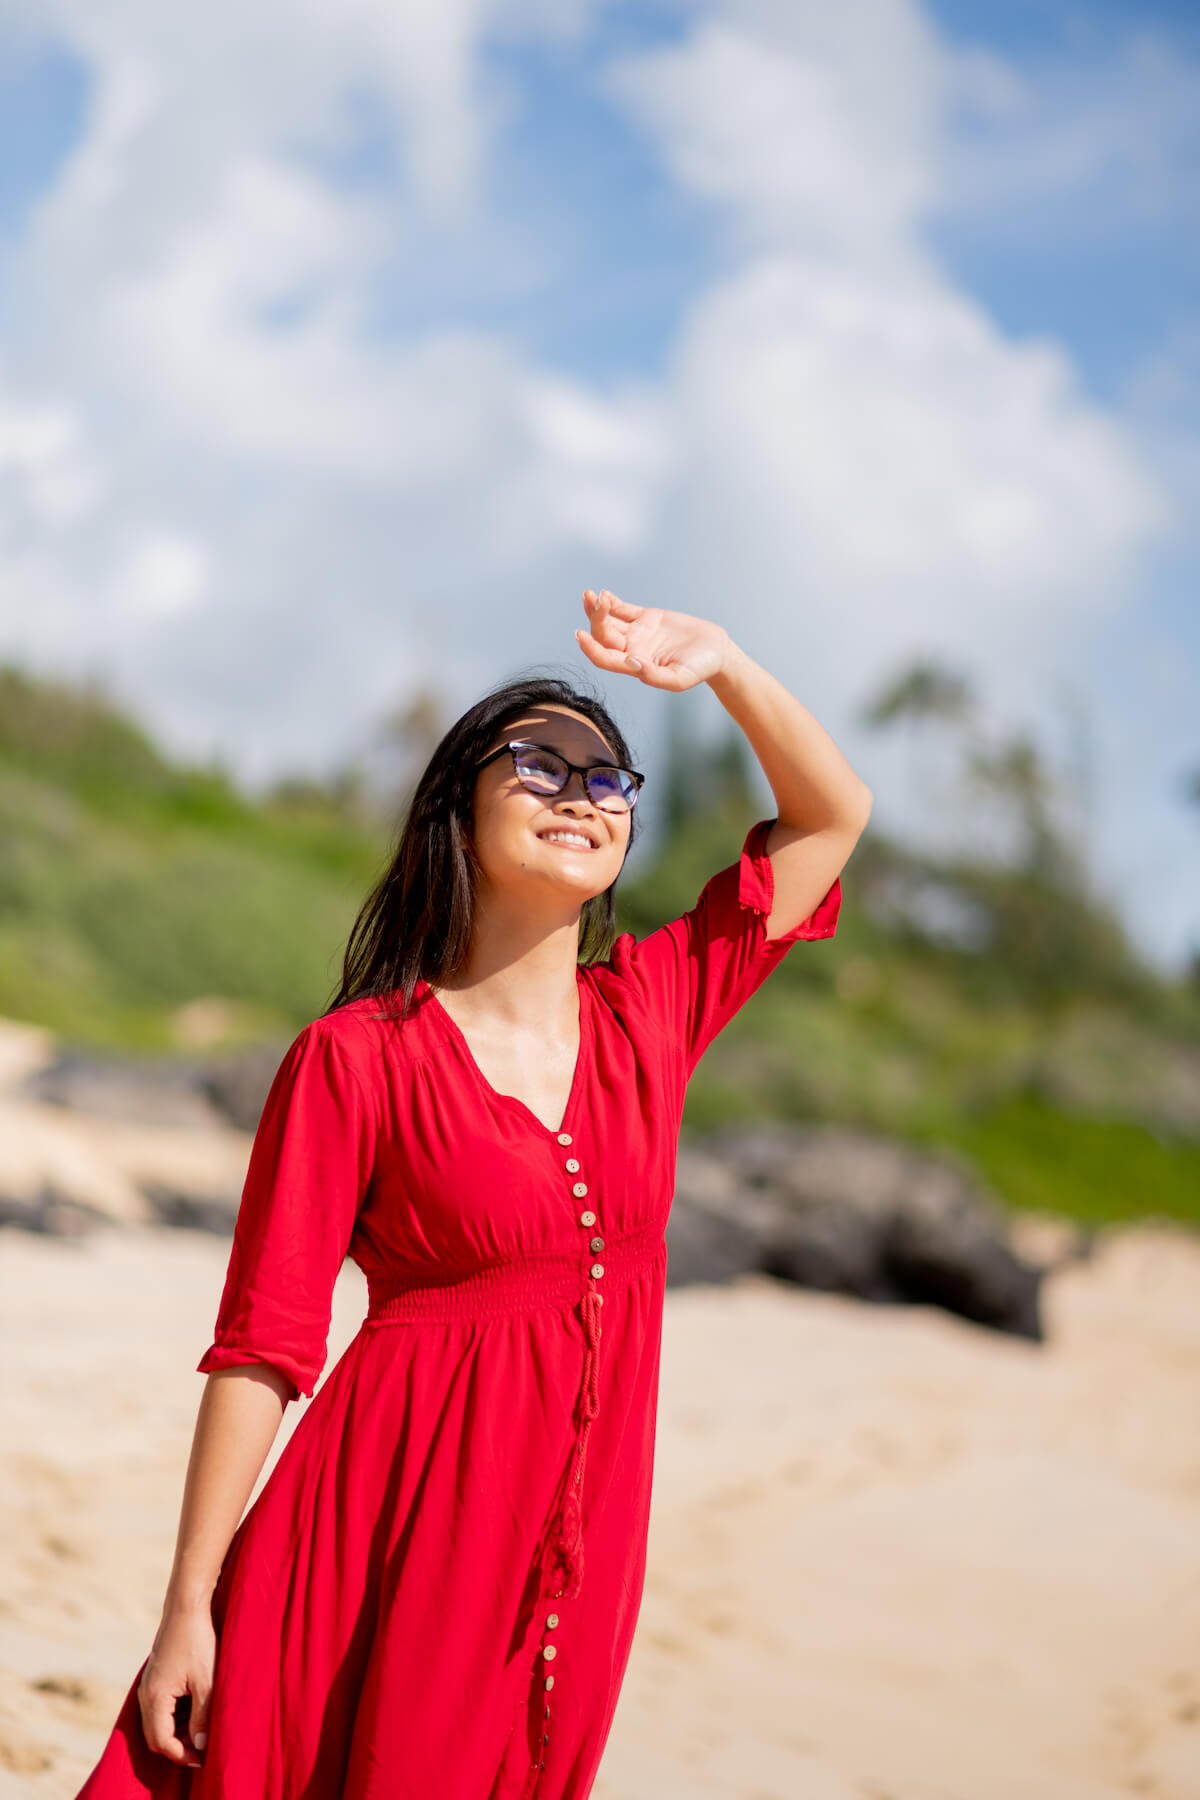
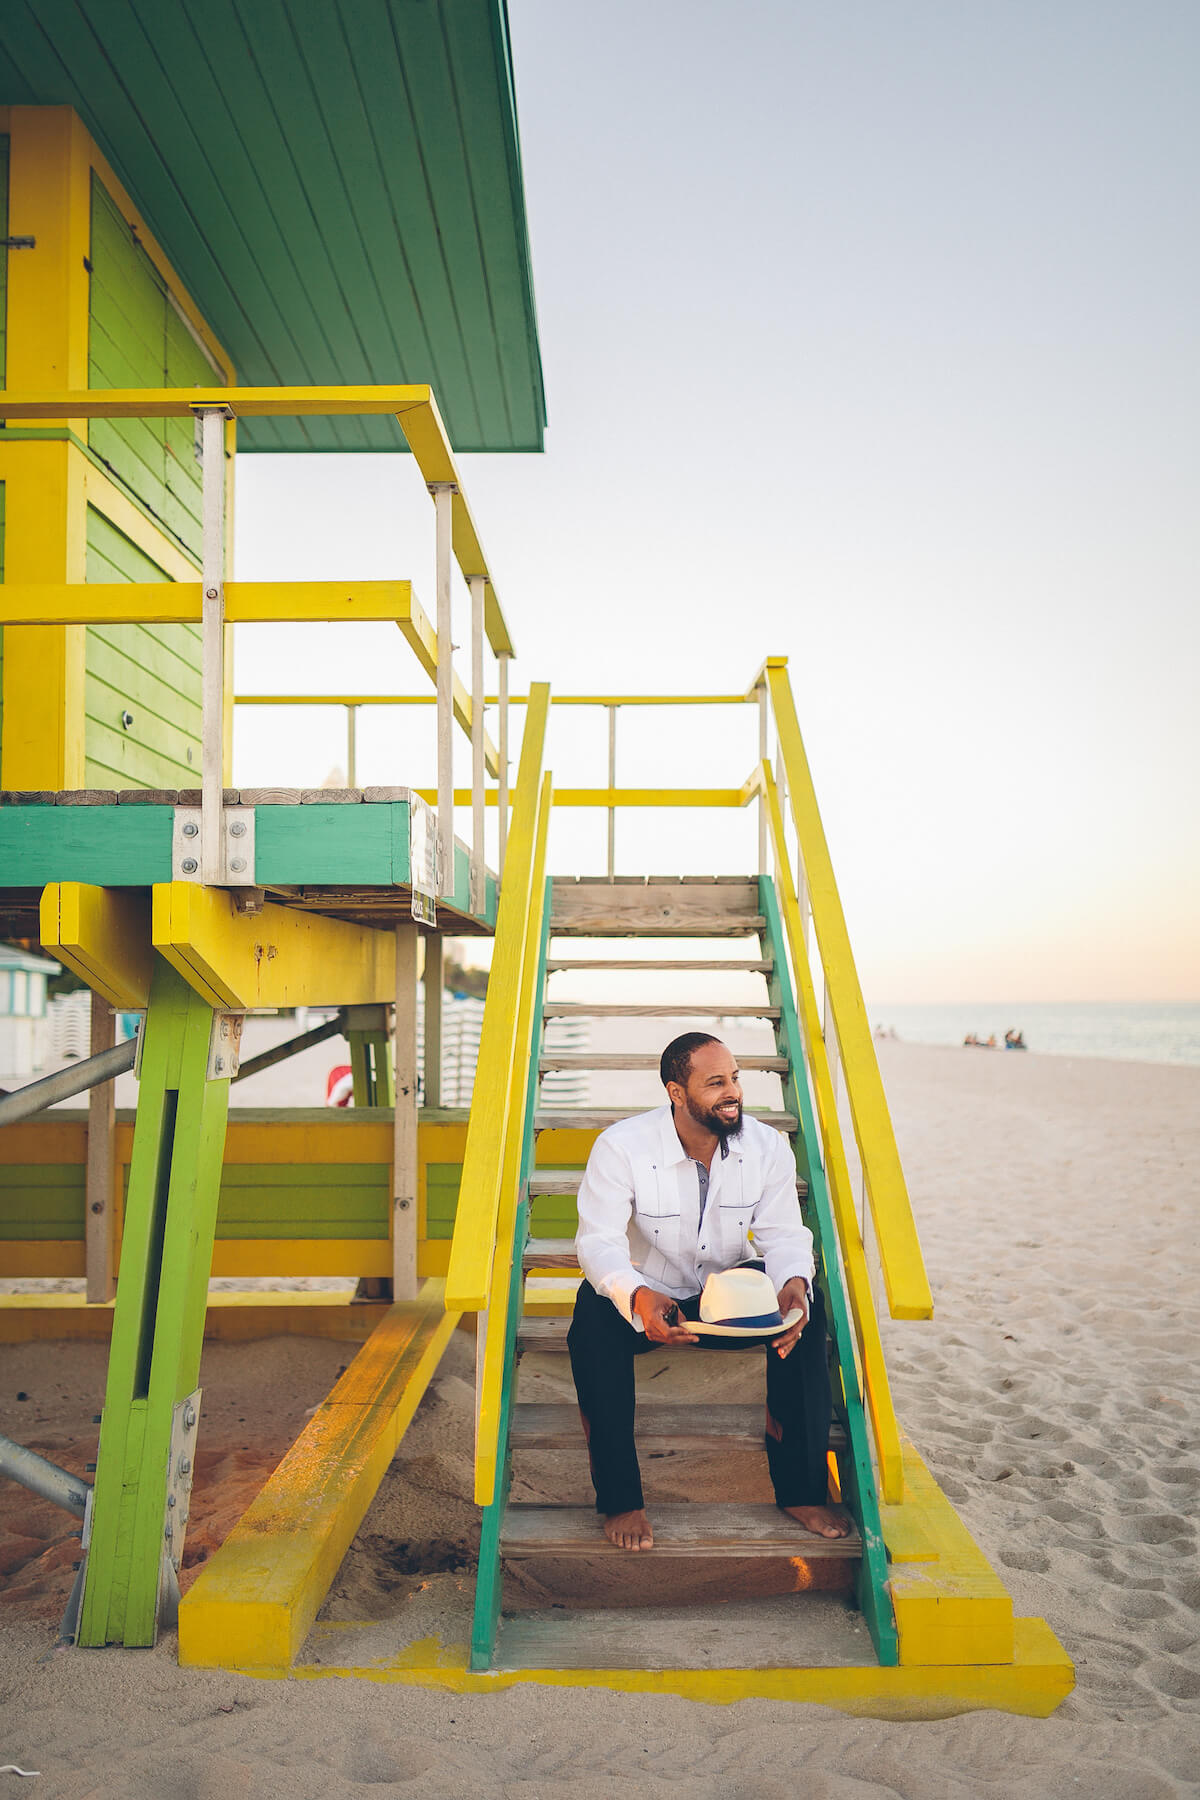
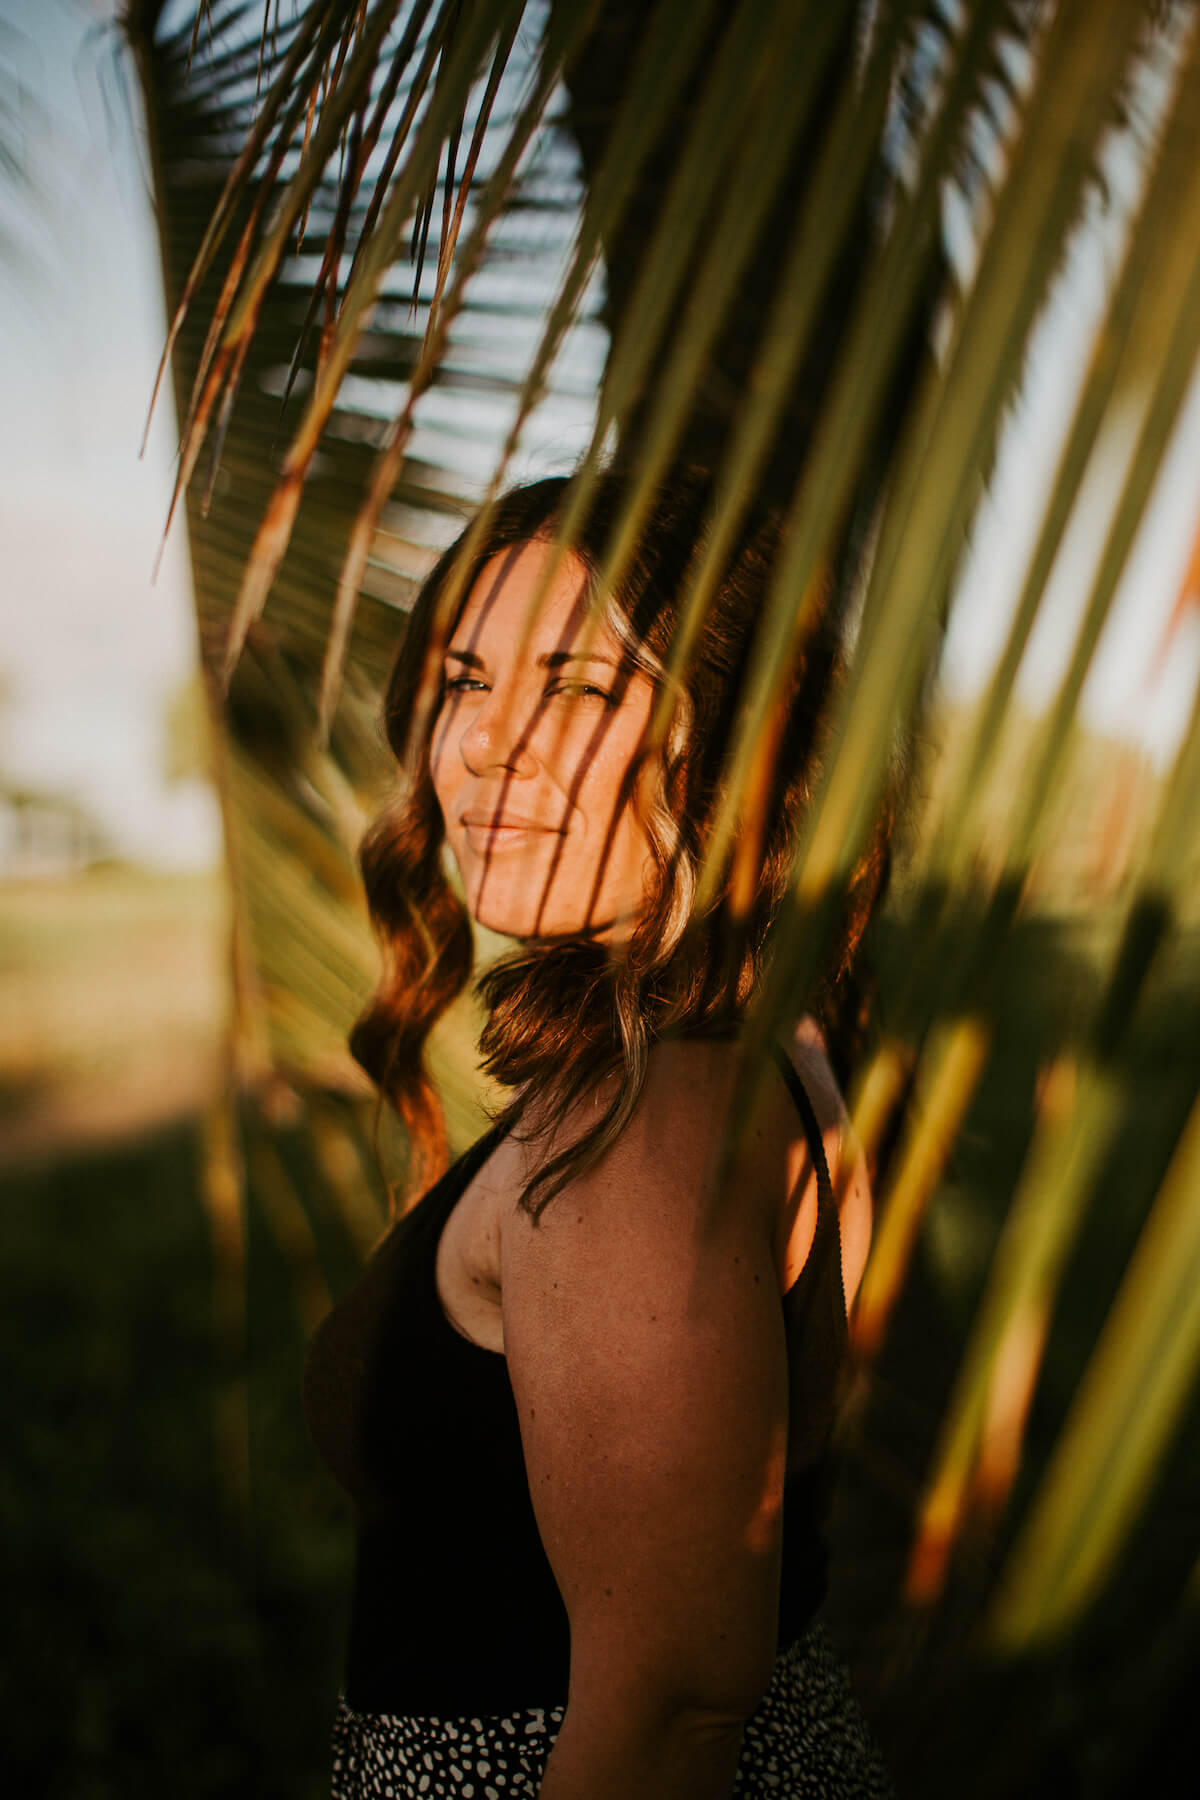
HARSH LIGHT
The photo above was taken when the sun was high in the sky, which created harsh lighting conditions. When the subject raised her hand to block the sun, a stark shadow appeared.
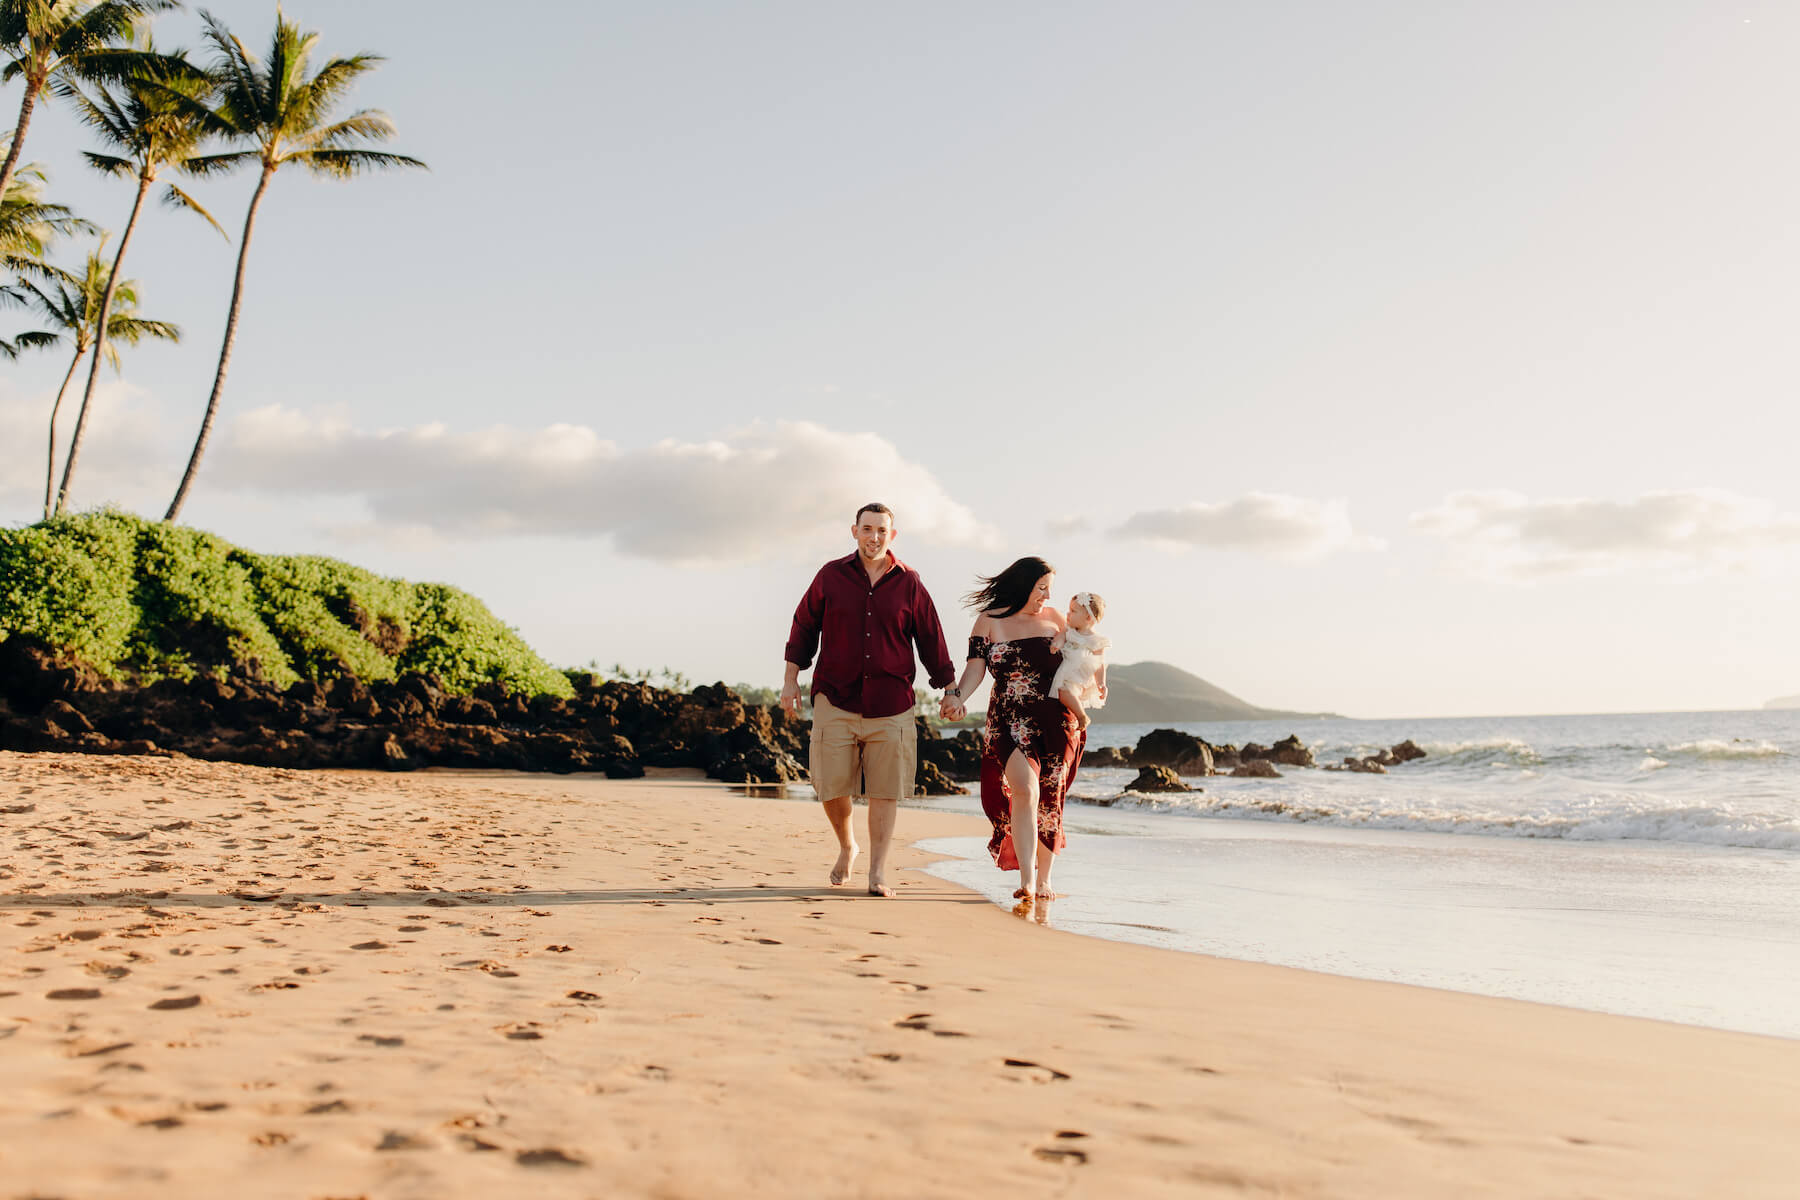
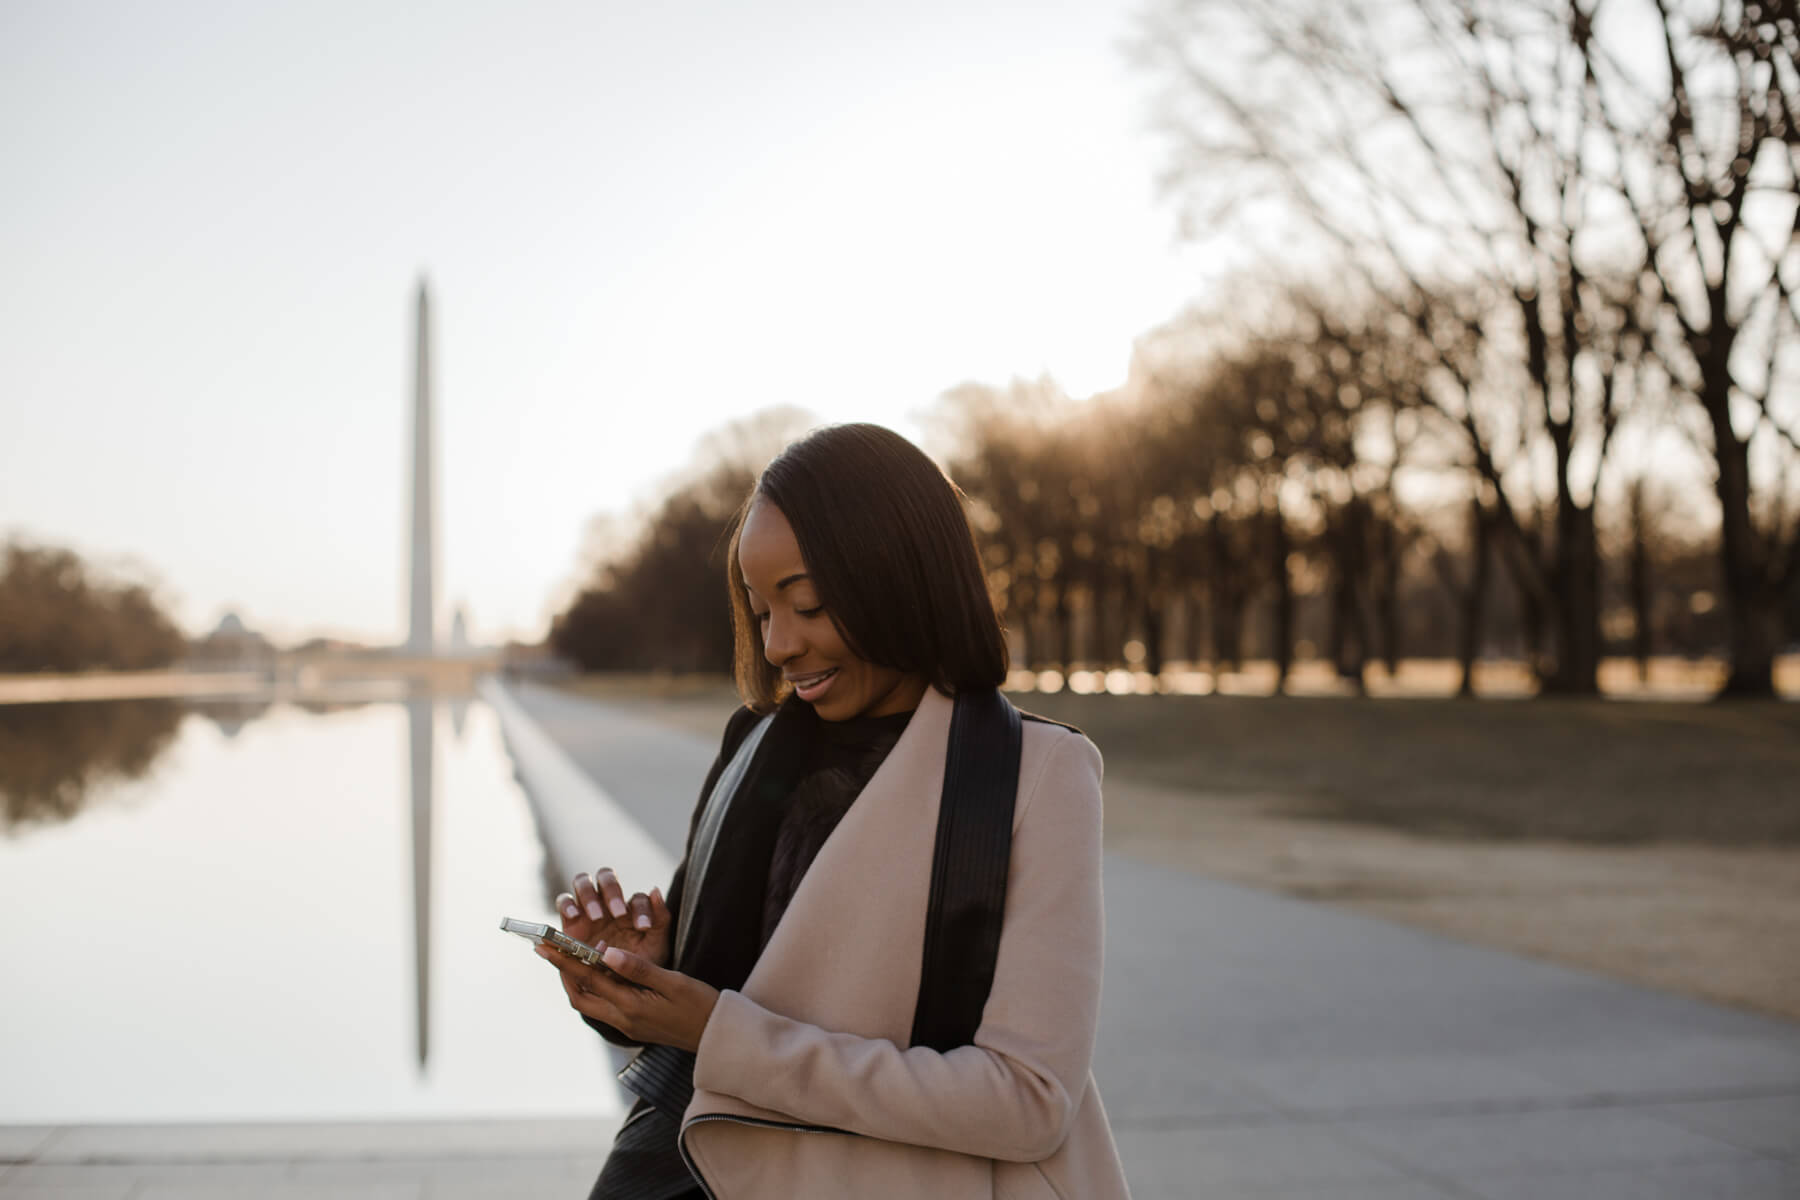
2. The best time of day is golden hour
You can work to find the good light, or you can let the good light come to you! Golden hour is the crème de la crème of light (and it’s often called “magic hour,” as well). ✨ It means the hour after sunrise and the hour before sunset, when the sun is low on the horizon, and it creates stunning light every time for both portrait and landscape photography.
If you’re planning ahead to take photos, simply Google the sunrise or sunset time in your area and plan to take photos then! Good timing is one of our simplest photography tips to set you up for success. 🌅
Get 10 Free iPhone Photo Tips!
We made a downloadable cheat sheet just for you with our favourite iPhone photo tips! Sign up for our mailing list and get your download instantly.
3. Consider your light source
So you know the difference between soft and harsh light, as well as the best time of day to take photos … but what does that actually mean for you? Here are some practical tips:
- In a moment with soft light, keep the light source in front of your subject and behind you, the photographer.
- In a moment with harsh light, try to keep in the shadows (or “open shade”). Look for a building or tree to hide the sun behind to diffuse the hard light.
- If there is no way to block the harsh light with shadows, keep the light source behind your subject and just out of the frame. You’ll avoid squinty eyes and unflattering shadows that are inevitable when your subjects are facing the sun directly.
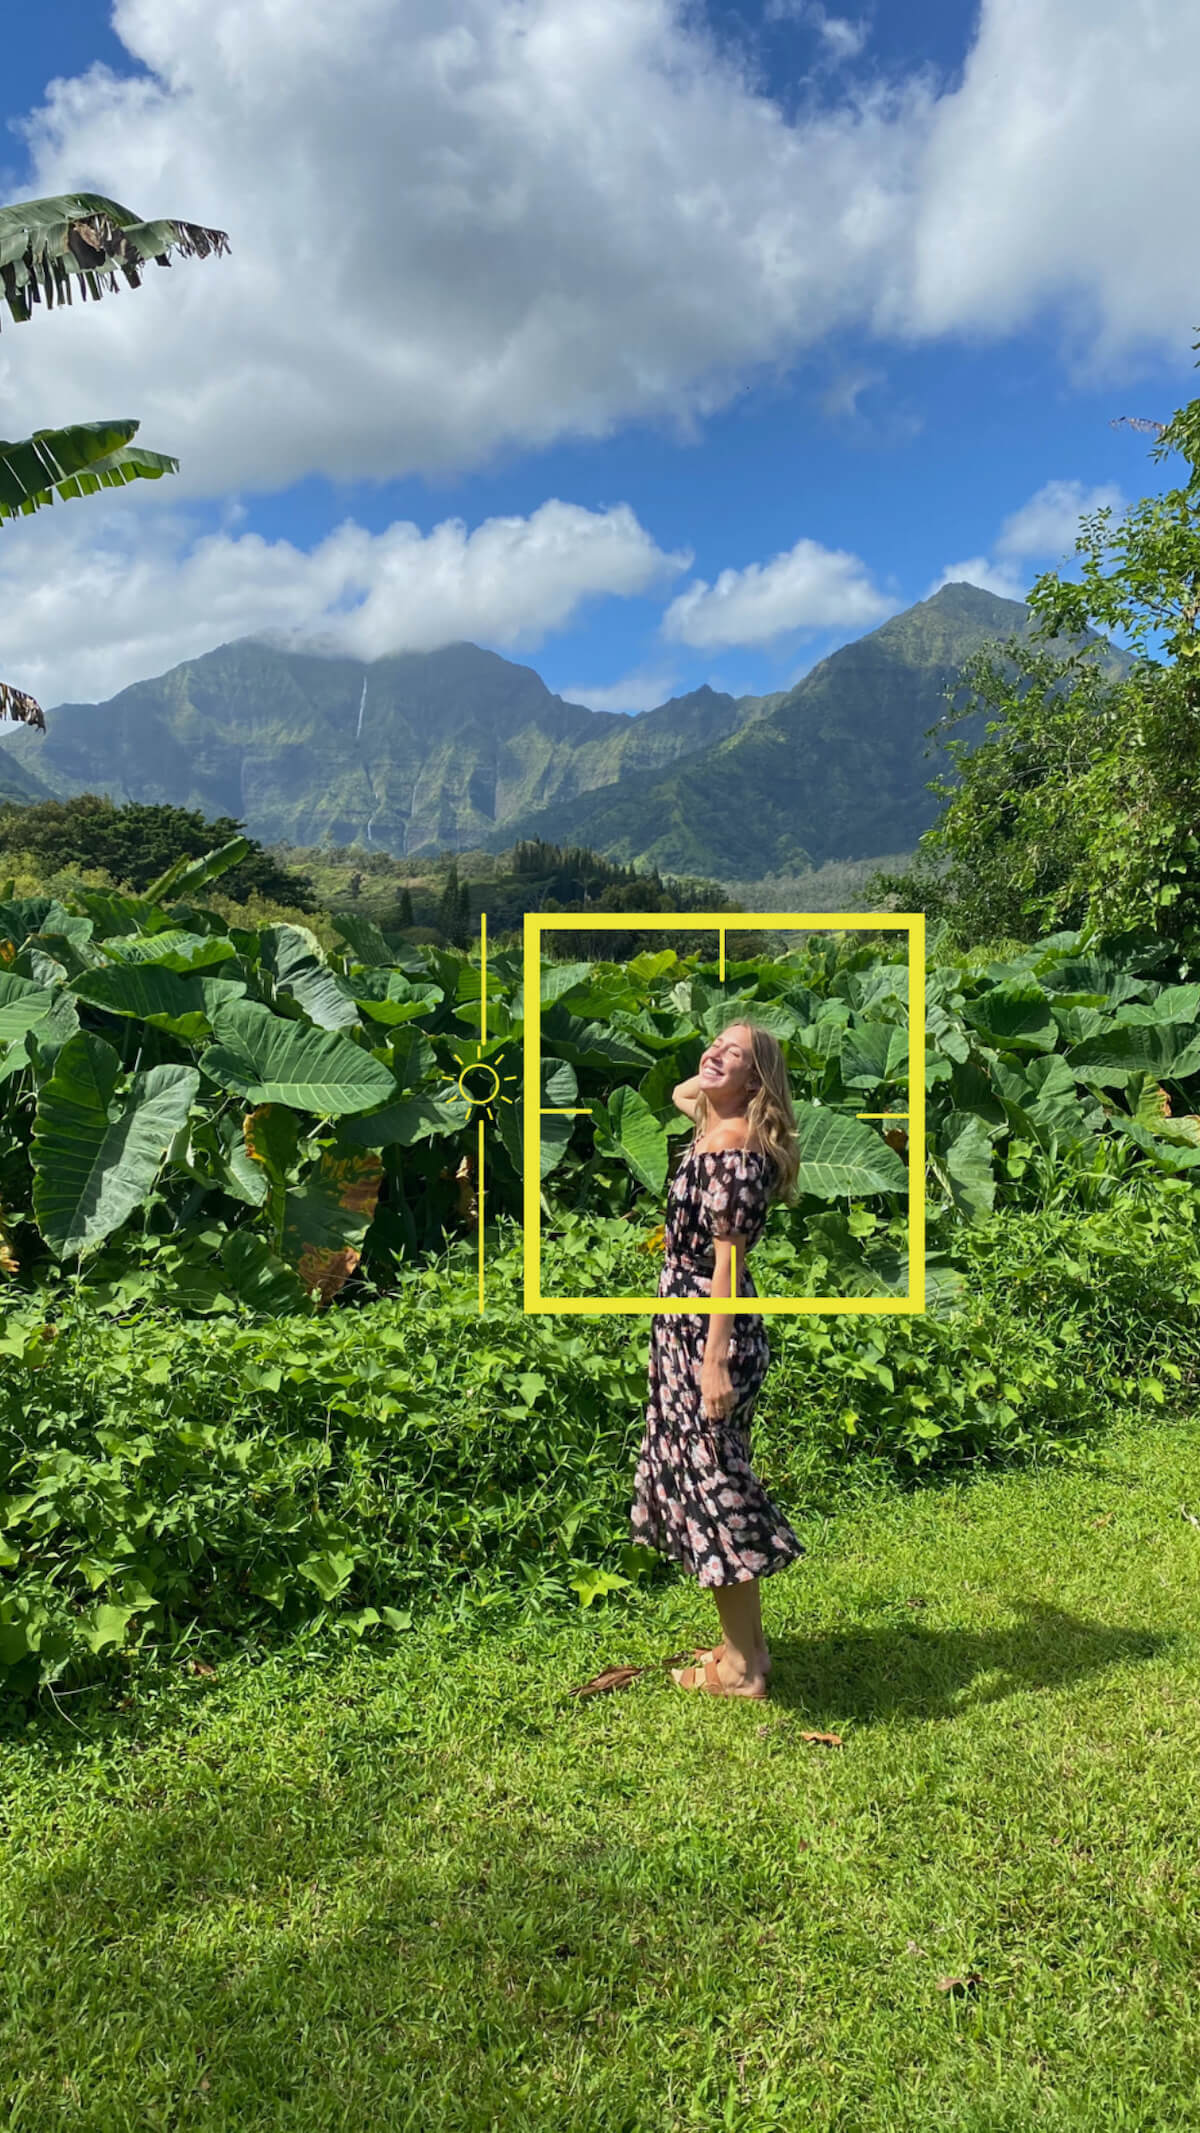
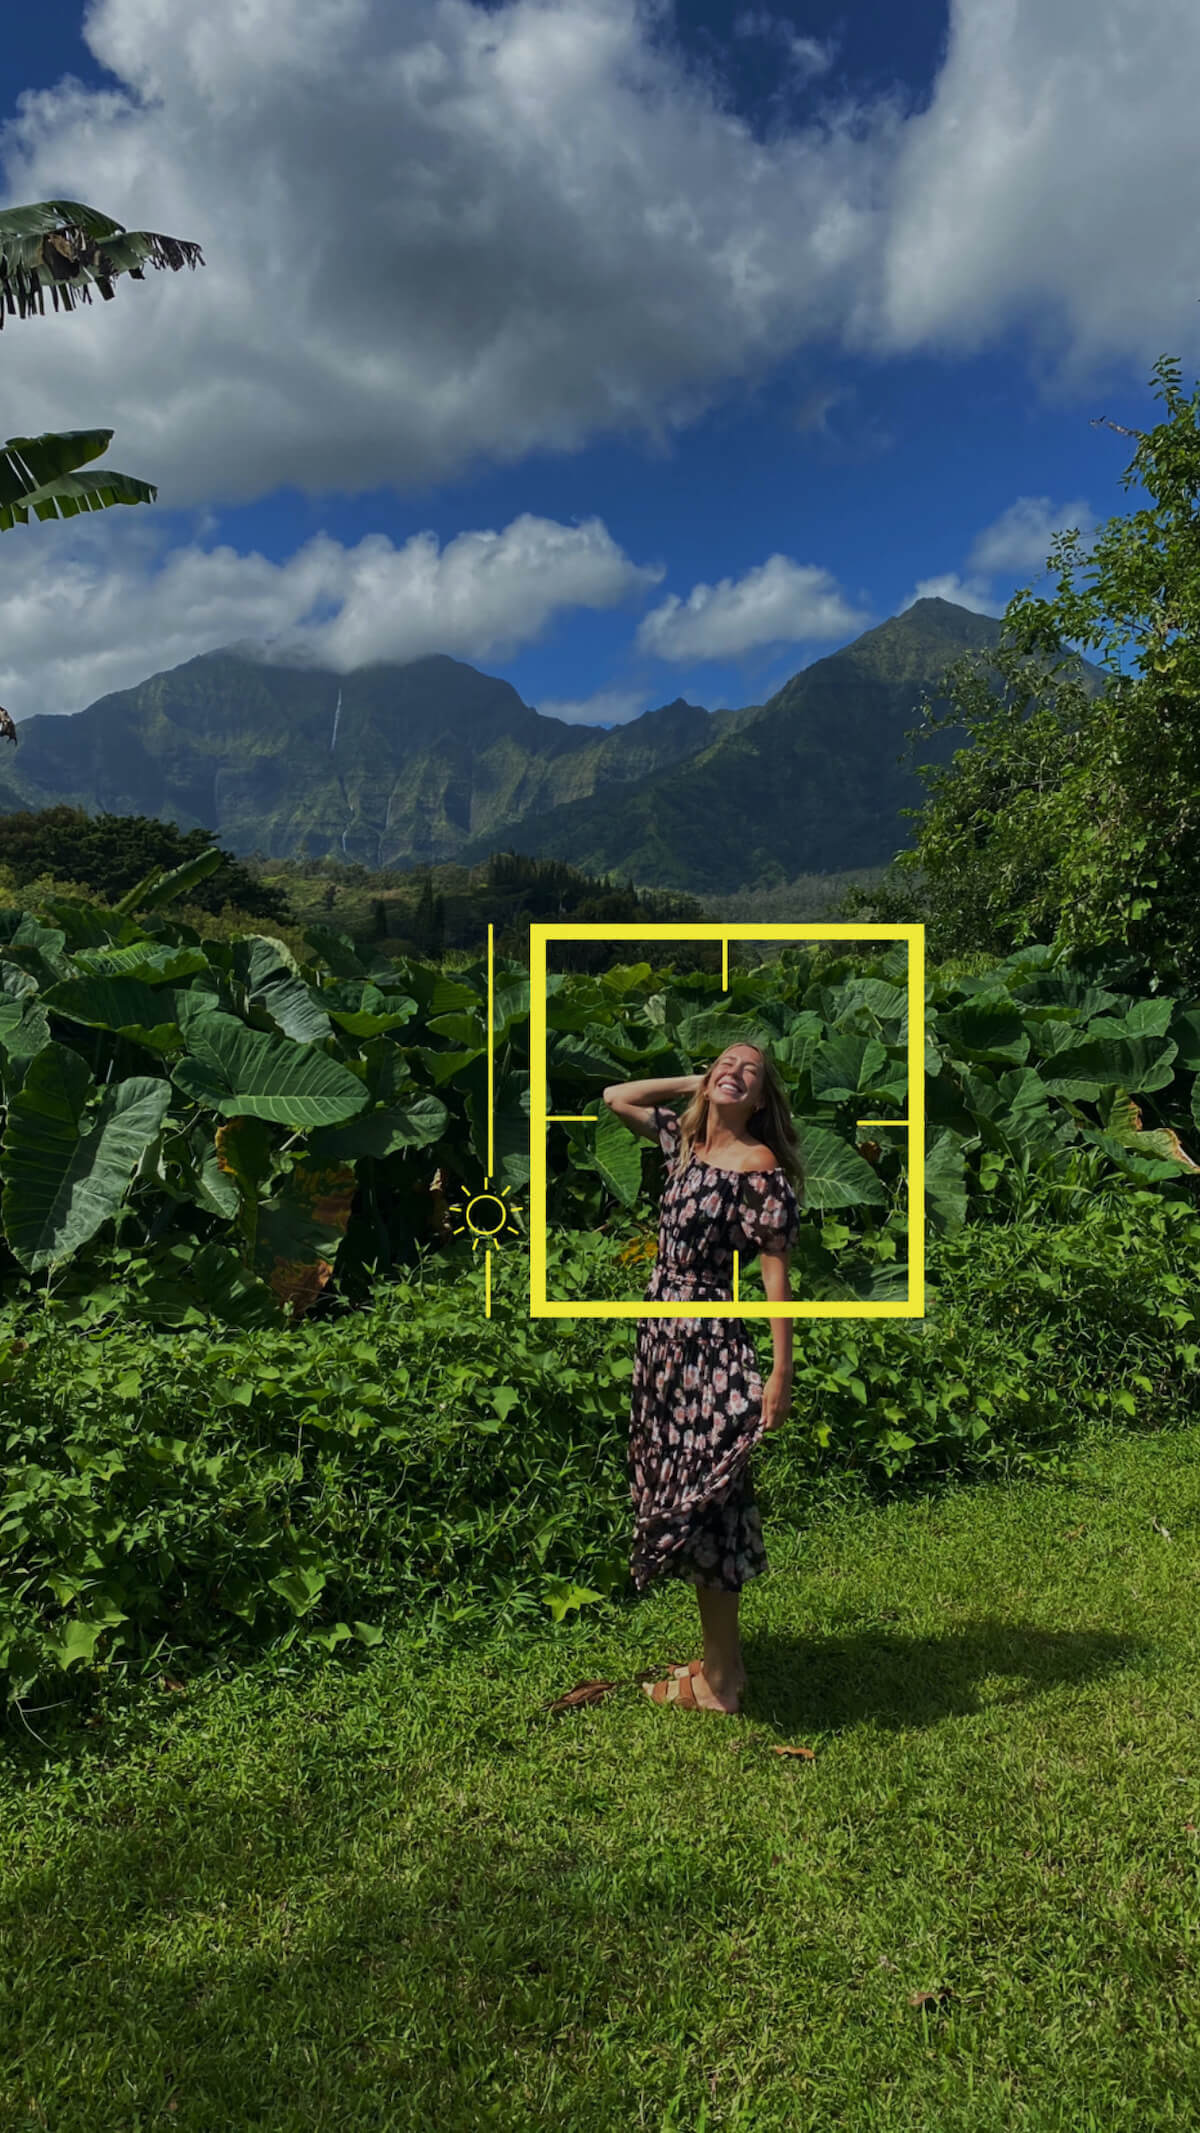
4. Adjust & lock the exposure slider
If your iPhone can’t get the lighting just right, we have an easy hack for you. Simply tap the screen on your subject as you’re framing your photo, and then hold your finger on the second tap and slide up or down. You’ll see a small sun icon that represents the exposure. This allows you to manually adjust the brightness of your photo. 🤯
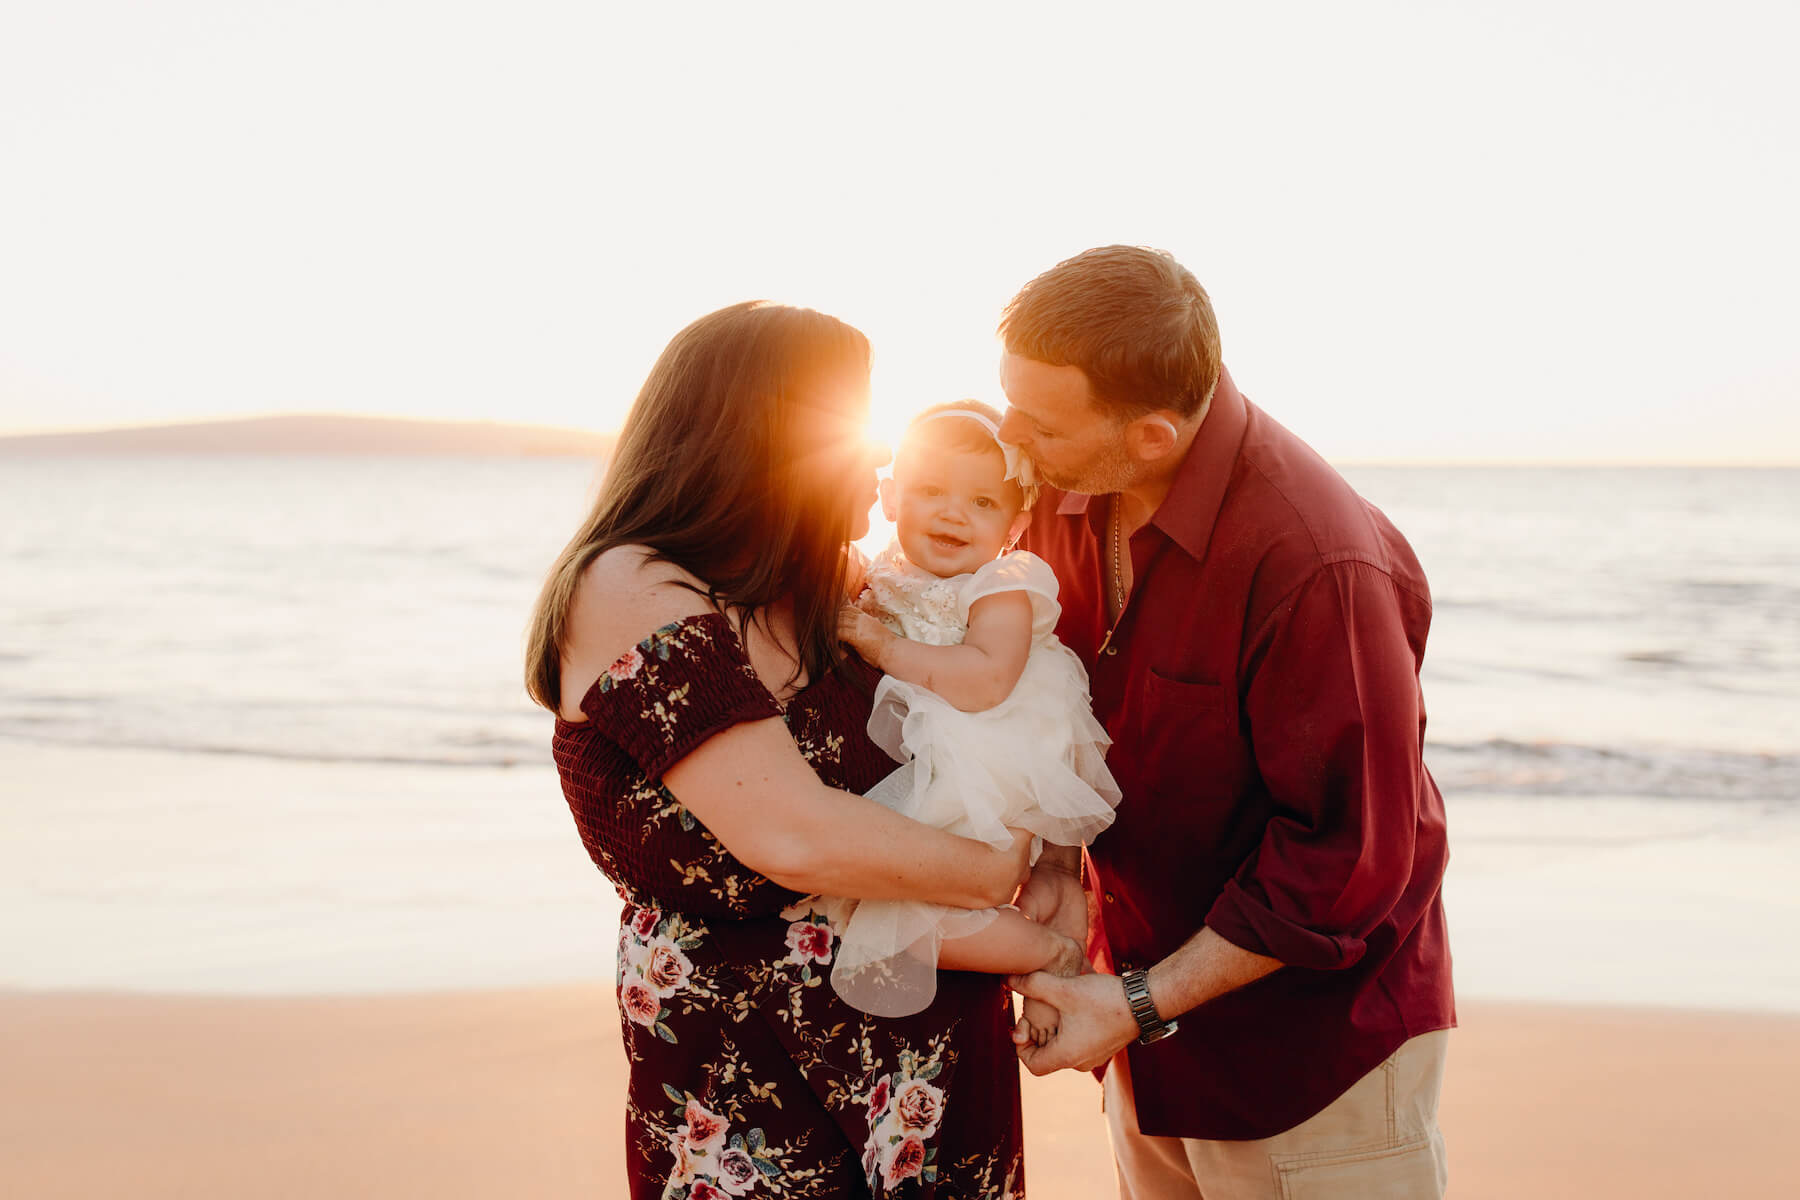
Overexposed image:

Properly-exposed image:
Underexposed image:
5. Keep your lens clean
Our simplest, hassle-free trick of all for taking a high-quality photo is simply wiping your lens! You can have the best light in the world, everyone dressed perfectly and a beautiful backdrop … but if your camera lens is dirty, you’ll be left with a blurry, lackluster image that even photoshop can’t fix. 🤦♀🤦♂️ Make a habit of wiping your iPhone camera lens on the hem of your shirt or a cloth every time you prepare to take a photo, and your future memories will thank you!
Capturing memories every day
The best way to take amazing photos is to practice! Even if it’s just taking photos of your kids as they eat their breakfast, snapping photos of your partner on your walk to the coffee shop, or taking a selfie to start off your day, every photo you take will help you feel more comfortable behind the camera. Don’t forget to use the #FlytographerChallenge hashtag when you post your photos on social media to be entered into our giveaway and avoid these common iPhone mistakes! We can’t wait to see what you capture. 📸
Better Everyday Photos With Your iPhone
Bundle up and save 25% when you purchase the Flytographer iPhone photography course with our Preset Collection!
ABOUT THE AUTHOR

Meg Wilson
Meg is a professional blogger for photographers and travel brands with a focus on Digital Marketing. She is a freelance photographer as well as an avid traveller herself with a passion for documenting moments in time. The vacation photography niche is the perfect place for her to work creatively.